
Fixing a Running Toilet: What the Tank Is Telling You

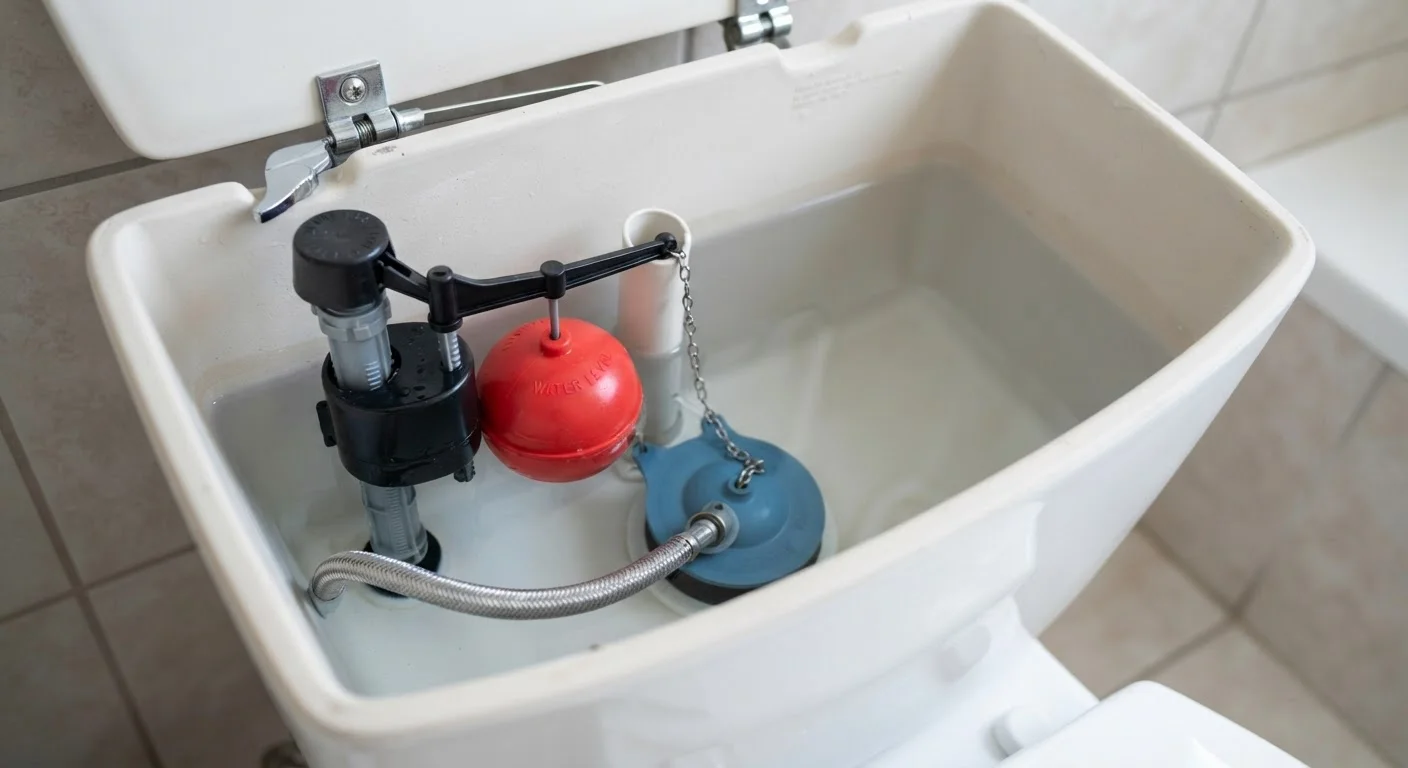
Photo: Online-Searches.net | Explore Insightful Blogs editorial
Key Takeaways
- A running toilet is almost always caused by a faulty flapper, misadjusted float, or worn fill valve.
- Most repairs require no special tools and cost only a few dollars in replacement parts.
- Diagnosing the sound and behavior of the running water points directly to the broken component.
- Turning off the water supply before any repair prevents accidental flooding.
- Replacing a flapper is the most common fix and typically takes under 15 minutes.
What Your Running Toilet Is Trying to Tell You
A toilet that runs continuously isn't just annoying — it can waste hundreds of gallons of water per day. The good news is that the sound, timing, and behavior of the running water give you a reliable clue about exactly which part has failed. There are three main culprits inside the tank: the flapper, the float, and the fill valve. Each one fails in a recognizable way.
Before you open the tank lid, listen carefully. If water runs constantly and never stops, the flapper is likely not sealing properly. If water runs, stops, then starts again on its own in a cycle — often called phantom flushing — that's also a flapper issue, but a subtler one. If the tank fills correctly but water trickles into the bowl even when everything seems quiet, water may be spilling over the top of the overflow tube, indicating the float is set too high.
Listen Before You Look
Understanding which failure pattern you have before touching anything saves time and ensures you buy the right replacement part on your first hardware store trip.
Tools and Parts You'll Need
This repair is designed for everyday homeowners with no plumbing experience. Gather these items before you start.
Adjustable pliers
Used to loosen and tighten the fill valve nut under the tank if replacement is needed.
Replacement flapper
Seals the opening at the bottom of the tank; the most commonly replaced toilet part.
Replacement fill valve
Controls water flow into the tank after flushing; replaced when the valve won't stop running.
Sponge or small towel
Absorbs residual water in the tank when you need to work with the tank empty.
Ruler or tape measure
Helps confirm the correct water level relative to the overflow tube mark.
What you will need
Step-by-Step: Diagnosing and Fixing the Problem
Follow these steps in order. Each one either solves the problem or narrows down what to replace next.
Turn Off the Water Supply
Locate the shut-off valve on the wall or floor behind the toilet. Turn it clockwise until it stops. Flush the toilet once to empty the tank so you can see and work with the internal parts clearly.
Remove the Tank Lid and Inspect the Water Level
Carefully lift the porcelain lid and set it flat on a stable surface. Look at the water line inside the tank. The correct level should sit approximately one inch below the top of the overflow tube (the tall open pipe in the center of the tank). If water is running into or over that tube, your float is set too high — skip ahead to Step 4.
Test and Replace the Flapper
Push down firmly on the rubber flapper at the bottom of the tank with your finger. If the running stops immediately, the flapper is your problem — it's no longer sealing properly. To replace it: unhook the flapper ears from the pegs on either side of the flush valve seat, and disconnect the chain from the flush handle arm. Take the old flapper to the hardware store to match the size and shape, as they vary by toilet model. Snap the new flapper onto the seat pegs, reattach the chain (leave about half an inch of slack), turn the water back on, and test.
Adjust or Replace the Float
If water is spilling into the overflow tube, the float needs to be lowered. On a ball-float design (an old-style arm with a ball on the end), bend the arm gently downward or turn the adjustment screw at the base of the arm counterclockwise. On a modern cup-float design (a cylinder around the fill valve), pinch the clip or turn the adjustment screw to slide the float down the valve shaft. Turn the water on briefly to recheck the level. Repeat until the water settles one inch below the overflow tube opening.
Replace the Fill Valve If It Still Runs
If the flapper is new, the float is correctly adjusted, and water continues to run, the fill valve itself has likely worn out. Turn off the water supply, flush and sponge out remaining water. Under the tank, use adjustable pliers to remove the locking nut on the fill valve shank. Lift the old valve out from inside the tank. Insert the new fill valve, following the manufacturer's height adjustment instructions so the critical level mark sits above the overflow tube. Hand-tighten the nut underneath, reconnect the refill tube to the overflow pipe, turn the water back on, and flush to confirm normal operation.
When to Call a Plumber
Most running toilets are fixed by the steps above. However, if the fill valve continues to run after replacement, or if you notice cracks in the porcelain tank, water around the base of the toilet, or corrosion on the supply line connection, it's time to call a licensed plumber. Similarly, if your toilet is older and multiple components have failed at once, a plumber can assess whether a full unit replacement makes more economic sense than continued part-by-part repair.
Know the Limits of DIY Plumbing
Repairs involving the water supply line connection to the wall, or any work on the drainage stack below the floor, fall outside DIY territory and require a licensed professional. Permit requirements vary by municipality, so check local codes if you're unsure about the scope of your repair.
The content provided on our blog site traverses numerous categories, offering readers valuable and practical information. Readers can use the editorial team’s research and data to gain more insights into their topics of interest. However, they are requested not to treat the articles as conclusive. The website team cannot be held responsible for differences in data or inaccuracies found across other platforms. Please also note that the site might also miss out on various schemes and offers available that the readers may find more beneficial than the ones we cover.